Homemade sourdough is a labor of love, but for those avoiding gluten, it can feel like an impossible challenge. Traditional sourdough relies on wheat-based flour, making it tricky to recreate a version that’s both gluten-free and delicious. But guess what? It’s absolutely possible!
In this guide, we’ll walk you through everything you need to know about making a gluten-free sourdough recipe from scratch. From crafting a gluten-free sourdough starter to troubleshooting sticky dough, you’ll get expert tips to bake a crusty, airy, and flavorful loaf without the gluten.
Table of Contents
Get ready to transform simple ingredients into a golden, tangy, and nourishing sourdough bread that rivals the real thing!
Why Make Gluten-Free Sourdough?
Switching to gluten-free bread doesn’t mean giving up on sourdough’s signature tang and chewy texture. In fact, making your own gluten-free sourdough recipe can be even more rewarding than traditional baking. But why should you give it a shot?
The Benefits of Gluten-Free Sourdough Bread
Sourdough isn’t just another bread it’s packed with gut-friendly benefits and a depth of flavor that other gluten-free breads often lack. Here’s why you should consider baking it at home:
✅ Easier to digest: The natural fermentation process breaks down starches and makes the bread gentler on your gut.
✅ No artificial additives: Unlike store-bought gluten-free bread, homemade sourdough skips preservatives and gums.
✅ Rich, tangy flavor: The long fermentation gives sourdough its signature depth and mild tang.
✅ Great texture: With the right flour blend, you can achieve a crispy crust and soft interior.
How Gluten-Free Sourdough Differs from Traditional Sourdough
If you’ve baked regular sourdough before, you’ll notice a few key differences when working with gluten-free flour blends:
- No gluten structure: Without gluten, the dough lacks elasticity, making it more delicate to handle.
- Different hydration needs: Gluten-free flour absorbs more liquid, so recipes often require higher hydration levels.
- Extended fermentation times: To develop the best texture and flavor, longer proofing times are needed.
Who Should Try Gluten-Free Sourdough?
Anyone can enjoy gluten-free sourdough bread, but it’s especially great for:
🥖 People with celiac disease or gluten sensitivity who miss the taste of real sourdough.
🥖 Home bakers who love experimenting with fermentation and new ingredients.
🥖 Anyone looking for a healthier gluten-free bread alternative with a clean ingredient list.
Ready to start? The next step is choosing the right ingredients because not all gluten-free flours are created equal!
There are no relevant internal linking opportunities for this topic from SoYummyRecipe.com. However, if you want more delicious baking ideas, you can explore other gluten-free recipes on similar websites.
Essential Ingredients for a Gluten-Free Sourdough Recipe
Making the perfect gluten-free sourdough recipe starts with the right ingredients. Unlike traditional sourdough, gluten-free baking requires a special mix of flours and binders to achieve the perfect balance of flavor, texture, and structure.
What is the Best Flour for Gluten-Free Sourdough?
Not all gluten-free flours work the same way, so choosing the right combination is key. Here are some of the best gluten-free flour options for sourdough:
- Brown Rice Flour – Adds a mild, nutty flavor and helps create a soft crumb.
- Sorghum Flour – A great alternative to wheat flour, offering a slightly sweet taste.
- Millet Flour – Light in texture, it helps create a balanced dough.
- Tapioca Starch – Improves elasticity and gives the bread a chewy texture.
- Buckwheat Flour – Adds a deep, earthy flavor and enhances the fermentation process.
Most bakers combine multiple flours to get the best results. If you’re unsure, a high-quality gluten-free flour blend with xanthan gum is a good starting point.
Binding Agents: Do You Need Xanthan Gum or Psyllium Husk?
Because gluten is what gives traditional sourdough its structure, you’ll need a binding agent to hold the dough together.
- Psyllium Husk Powder – The best option for gluten-free sourdough, as it helps absorb moisture and creates a bread-like texture.
- Xanthan Gum – Works well but doesn’t provide the same elasticity as psyllium husk.
- Ground Flaxseed or Chia Seeds – Natural alternatives that add fiber and help with binding.
Using psyllium husk is highly recommended, as it mimics the stretchiness of gluten and improves the bread’s structure.
Importance of Water, Salt, and Fermentation Time
- Filtered Water: Chlorine in tap water can harm the natural bacteria in sourdough. Always use filtered or spring water.
- Salt: Use unrefined sea salt for better flavor and to control fermentation.
- Fermentation Time: A longer fermentation (12-24 hours) enhances the tangy sourdough taste and makes the bread easier to digest.
By choosing the right flours, binders, and fermentation methods, you’ll set yourself up for success in making an authentic gluten-free sourdough recipe.
How to Make a Gluten-Free Sourdough Starter
A gluten-free sourdough starter is the foundation of great sourdough bread. This natural yeast mixture replaces commercial yeast and gives your bread a unique depth of flavor and texture.

Step-by-Step Guide to Creating a Starter from Scratch
Making a gluten-free starter is easy it just requires flour, water, and patience.
1️⃣ Day 1: In a clean jar, mix ½ cup of gluten-free flour (brown rice flour works well) with ¼ cup of filtered water. Stir until smooth, cover loosely, and leave at room temperature.
2️⃣ Day 2: Check for bubbles. If you see none, stir the mixture and let it sit for another 24 hours.
3️⃣ Day 3: Feed the starter by adding another ½ cup of flour and ¼ cup of water. Mix well and let it ferment.
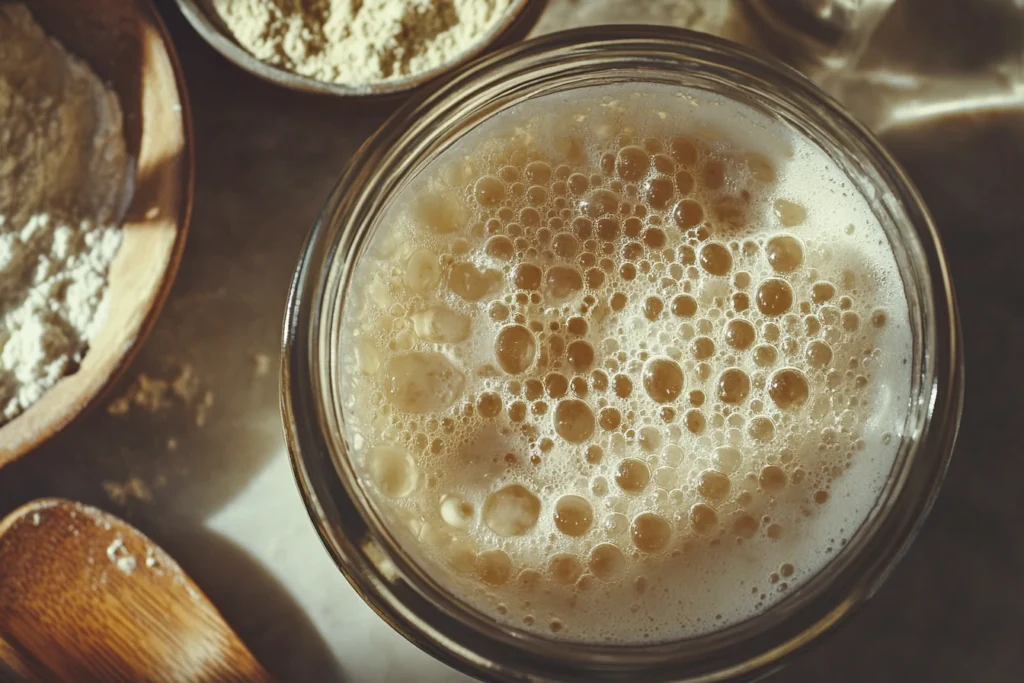
4️⃣ Day 4-7: Continue feeding it daily. By Day 5 or 6, you should see a bubbly, slightly sour-smelling starter. Once it doubles in size within 6-8 hours of feeding, it’s ready for baking!
How to Feed and Maintain a Healthy Starter
Once your starter is active, you’ll need to keep it healthy with regular feedings:
- If baking often: Feed it once a day at room temperature.
- If baking less frequently: Store it in the fridge and feed it once a week.
When you’re ready to bake, take it out of the fridge, feed it, and let it sit at room temperature for a few hours until it’s bubbly again.
Troubleshooting Common Starter Problems
❌ No Bubbles? The environment may be too cold. Try placing your starter in a warm spot (around 75°F / 24°C).
❌ Too Runny or Too Thick? Adjust the water ratio gluten-free flours absorb moisture differently.
❌ Weird Smell? A healthy starter smells tangy, but if it smells like rotten eggs, discard and start over.
Once you have a strong, active gluten-free sourdough starter, you’re ready to bake your first loaf! Up next: the ultimate gluten-free sourdough recipe.
The Ultimate Gluten-Free Sourdough Recipe
Now that you have an active gluten-free sourdough starter, it’s time to bake! This gluten-free sourdough recipe will give you a loaf that’s crisp on the outside, soft inside, and packed with that signature tangy flavor.

Step 1: Mixing the Dough
Start by gathering your ingredients:
✅ 3 ½ cups gluten-free flour blend (brown rice flour, sorghum flour, and tapioca starch work best)
✅ 1 cup active gluten-free sourdough starter
✅ 1 ½ cups filtered water
✅ 1 tbsp psyllium husk powder (for structure)
✅ 1 tsp sea salt
Instructions:
1️⃣ In a large bowl, mix the flour, psyllium husk, and salt.
2️⃣ Add the sourdough starter and water, stirring until combined. The dough will be slightly sticky.
3️⃣ Cover the bowl with a damp towel and let it rest for 30 minutes to allow the ingredients to hydrate.
Step 2: Bulk Fermentation and Resting
Fermentation is what gives sourdough its depth of flavor.
- Let the dough ferment at room temperature for 8-12 hours. A warm spot around 75°F (24°C) works best.
- Look for bubbles and a slight rise gluten-free dough won’t expand as much as wheat-based dough, but it should feel airy.
Step 3: Shaping and Proofing the Dough
Gluten-free dough is delicate, so handle it gently:
1️⃣ Dust a clean surface with gluten-free flour and lightly shape the dough into a round or oval loaf.
2️⃣ Place the dough on parchment paper and let it proof for 1-2 hours at room temperature.
3️⃣ For extra fermentation, you can refrigerate it overnight and bake the next day.
Step 4: Baking for a Perfect Crust and Soft Interior
The final step is baking your gluten-free sourdough bread to perfection:
🔥 Preheat your oven to 450°F (232°C).
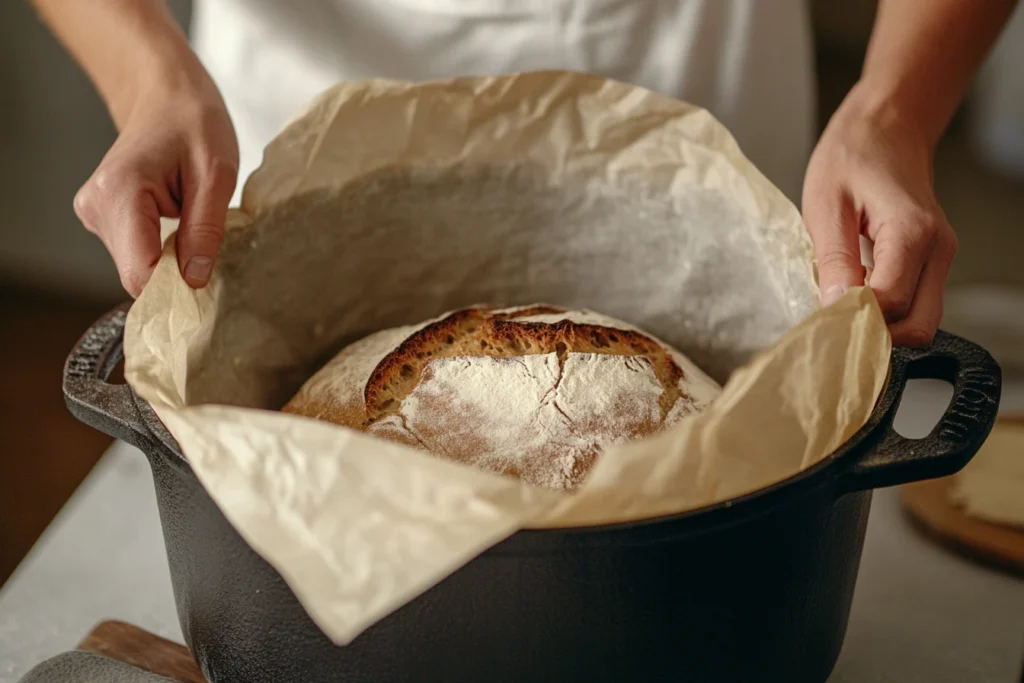
🔥 Place a Dutch oven inside to heat up (this traps steam, creating a crispy crust).
🔥 Transfer the dough with parchment paper into the Dutch oven.
🔥 Cover and bake for 40 minutes, then uncover and bake for 10-15 more minutes for a deep golden crust.
🔥 Let the bread cool completely before slicing it helps set the crumb!
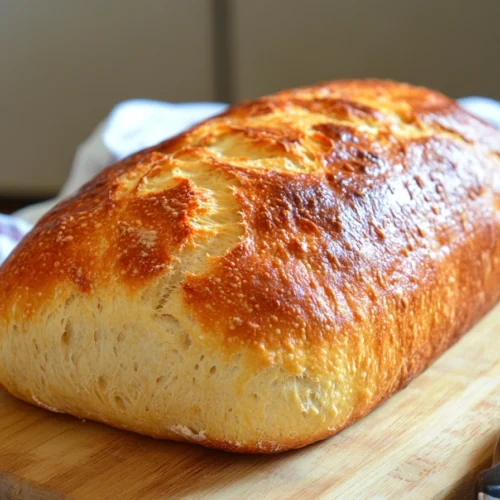
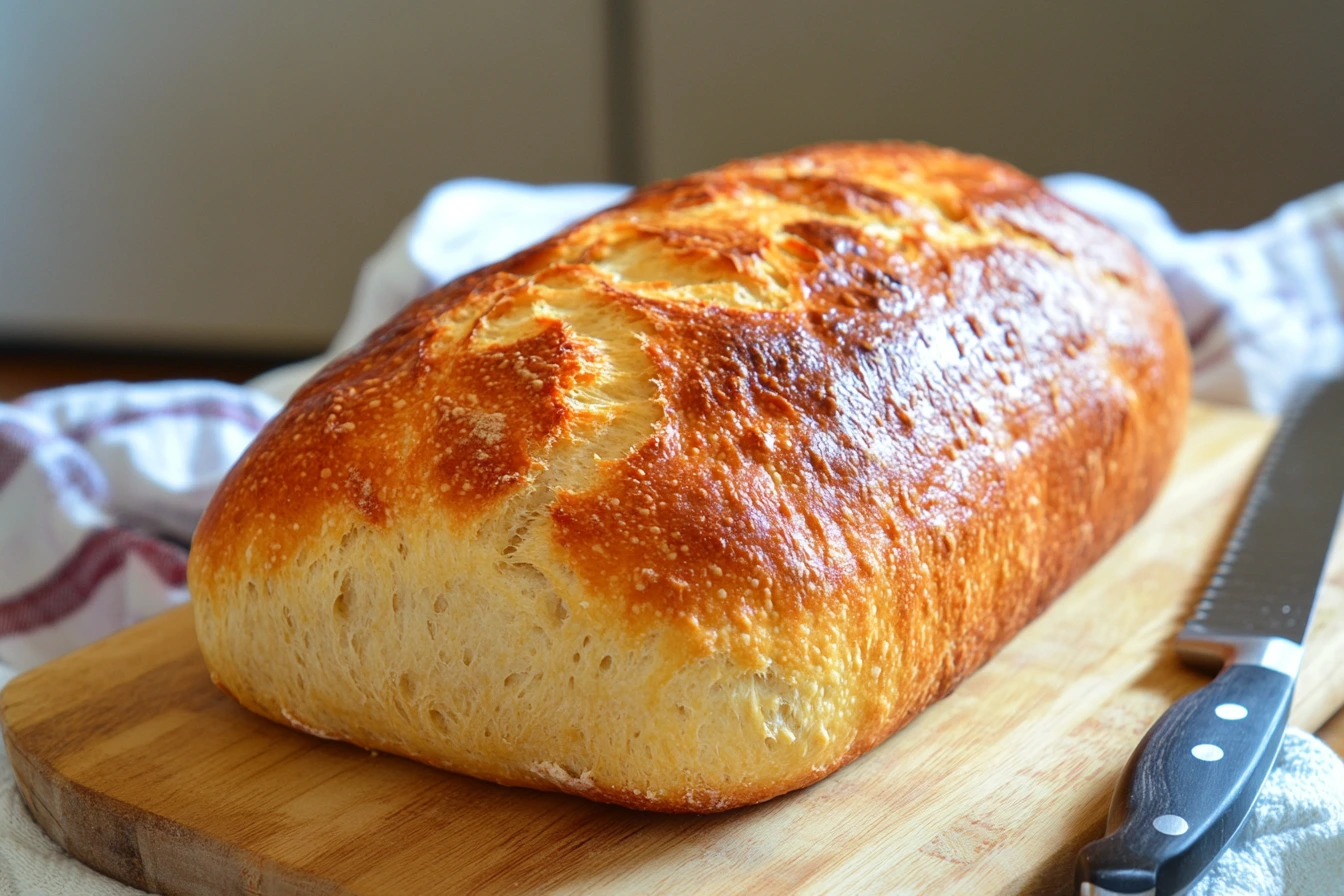
And that’s it! You now have a delicious, homemade gluten-free sourdough bread that’s perfect for toasting, sandwiches, or just enjoying with butter.
Tips and Tricks for Better Gluten-Free Sourdough
Baking gluten-free sourdough bread can feel tricky at first, but these expert tips will help you get better texture, rise, and flavor every time.
How to Get a Better Rise Without Gluten
Since gluten provides elasticity, gluten-free dough needs extra support. Here’s how to get a light and airy loaf:
✅ Use psyllium husk powder – It improves structure and makes the bread less crumbly.
✅ Let the dough rest before baking – Hydration is key! Resting the dough lets the flours absorb water properly.
✅ Ferment longer – The 8-12 hour bulk fermentation enhances flavor and makes the bread easier to digest.
✅ Bake in a Dutch oven – Trapping steam in the early stages of baking gives a better crust and rise.
Best Storage Methods to Keep Your Bread Fresh
Unlike regular sourdough, gluten-free bread dries out faster. Here’s how to keep it soft and fresh:
🥖 Room Temperature: Store in an airtight container for 2-3 days.
🥖 Refrigeration: Not recommended it dries out the bread.
🥖 Freezing: Slice the loaf and freeze it in an airtight bag for up to 3 months.
How to Adjust the Recipe for Different Flour Blends
Not all gluten-free flours work the same way, so tweaking the recipe might be necessary.
- For a denser loaf: Use buckwheat or oat flour for a heartier texture.
- For a lighter loaf: Increase the amount of tapioca starch or arrowroot flour.
- For a more rustic flavor: Add sorghum flour or teff flour for a nuttier taste.
By following these tips, you’ll get better results every time you bake a gluten-free sourdough recipe!
Common Mistakes and How to Fix Them
Even the best bakers run into issues when making a gluten-free sourdough recipe. But don’t worry most problems have simple fixes! Let’s look at the most common mistakes and how to solve them.
Why Is My Dough Too Sticky or Too Dry?
Since gluten-free flours absorb water differently, getting the right dough texture can be tricky.
❌ Too sticky?
- Add 1-2 tablespoons of extra flour and mix until it becomes manageable.
- Use wet hands when shaping to prevent sticking.
- Let the dough rest longer this allows the flours to absorb moisture properly.
❌ Too dry or crumbly?
- Increase the water or add a bit more psyllium husk for extra elasticity.
- Mix the dough thoroughly to hydrate all ingredients evenly.
How to Fix a Dense or Gummy Loaf
A heavy, gummy loaf is one of the biggest struggles in gluten-free baking. Here’s how to fix it:
✅ Increase fermentation time – Longer fermentation gives the dough a better rise and structure.
✅ Use a mix of flours – A blend of whole-grain and starchy flours creates a better texture.
✅ Make sure your starter is active – A weak sourdough starter won’t create enough air pockets.
Preventing Sourdough Starter from Going Bad
If your starter isn’t bubbling, smells bad, or grows mold, it may need help.
🚨 Solution:
- Feed it regularly (daily if kept at room temp, weekly if refrigerated).
- Use filtered water to avoid chlorine, which can kill natural yeast.
- If you see mold, discard it and start fresh better safe than sorry!
By following these fixes, you’ll be on your way to baking perfect gluten-free sourdough bread every time!
Frequently Asked Questions (FAQs)
Still have questions? Here are answers to some of the most common ones about making a gluten-free sourdough recipe.
What is the best flour for gluten-free sourdough?
The best flour depends on texture and flavor preferences. A mix of brown rice flour, sorghum flour, and tapioca starch works best for a balanced dough. If you prefer a rustic loaf, try buckwheat or teff flour.
Is homemade sourdough good for gluten-free diets?
Yes! Homemade gluten-free sourdough bread is a great alternative to store-bought options. It contains no preservatives, has a natural fermentation process, and is easier to digest than commercial gluten-free bread.
What is the trick to making good gluten-free bread?
The key is hydration and fermentation. Gluten-free flours need more moisture, so letting the dough rest and ferment longer helps create better structure. Also, using psyllium husk or flaxseed helps bind the dough together.
Is it possible to make a gluten-free sourdough starter?
Absolutely! A gluten-free sourdough starter is made using just gluten-free flour and water. It takes about 5-7 days to become active. Just remember to feed it regularly and keep it in a warm place for the best results.
By following these tips, you’ll master the gluten-free sourdough recipe and enjoy fresh, homemade bread with confidence!
Best Ways to Use Gluten-Free Sourdough Bread
Now that you’ve mastered the gluten-free sourdough recipe, it’s time to enjoy it in different ways! This bread isn’t just for sandwiches it can be used in savory meals, sweet treats, and even meal prep ideas.
Delicious Ways to Eat Gluten-Free Sourdough
Homemade gluten-free sourdough bread has a crispy crust and soft interior, making it perfect for a variety of dishes:
🥑 Avocado Toast – Top a toasted slice with mashed avocado, salt, pepper, and a drizzle of olive oil.
🥘 Sourdough Stuffing – Cube the bread and mix it with herbs, onions, and broth for a holiday stuffing.
🥣 Bread Pudding – Use stale sourdough for a sweet or savory bread pudding.
🥪 Grilled Cheese or Paninis – The sturdy texture holds up well when grilled with cheese and fillings.
🍞 French Toast – Soak slices in a mixture of eggs, milk, and cinnamon for a gluten-free breakfast treat.
How to Store and Refresh Your Sourdough Bread
Gluten-free sourdough bread dries out faster than traditional wheat bread, but there are ways to keep it fresh:
✅ Room Temperature: Store in an airtight bag for 2-3 days.
✅ Freezing: Slice the loaf and freeze in a sealed bag for up to 3 months.
✅ Refreshing a Stale Loaf: Sprinkle water on the crust and warm it in the oven at 350°F (175°C) for 10 minutes.
With these ideas, you’ll get the most out of your homemade gluten-free sourdough recipe!
Final Thoughts and More Recipe Ideas
Making a gluten-free sourdough recipe from scratch may seem challenging at first, but once you get the hang of it, the process is incredibly rewarding. The key to success is using the right flours, maintaining a strong starter, and allowing enough fermentation time.
Why You Should Keep Baking Gluten-Free Sourdough
Baking sourdough at home gives you full control over ingredients, fermentation, and freshness. Plus, homemade bread tastes so much better than store-bought options, which are often filled with preservatives.
By experimenting with different flour blends and hydration levels, you can create the perfect loaf tailored to your taste and dietary needs.
More Gluten-Free Baking Ideas
If you love this recipe, here are a few other gluten-free baked goods you might enjoy:
🥞 Gluten-Free Pancakes – Soft and fluffy, perfect for breakfast.
🥖 Gluten-Free Baguette – Great for sandwiches or garlic bread.
🍕 Gluten-Free Pizza Crust – Crispy on the outside, chewy inside.
🍪 Gluten-Free Cookies – A delicious dessert option.
Baking gluten-free sourdough bread is a journey, but each loaf gets better and tastier as you learn. Keep experimenting, keep baking, and enjoy the rewards of homemade, naturally fermented bread!
Looking for more gluten-free breakfast ideas? Check out our https://soyummyrecipe.com/gluten-free-pancakes-easy-recipe/for a fluffy and delicious morning treat!

Gluten-Free Sourdough Bread
Equipment
- Dutch Oven
- Mixing Bowl
- Wooden Spoon
Ingredients
Sourdough Starter
- 1 cup gluten-free sourdough starter active and bubbly
Dough
- 3 cups gluten-free flour blend
- 1 1/2 cups water lukewarm
- 1 tsp salt
- 1 tbsp olive oil optional, for softness
Instructions
- In a large bowl, mix the sourdough starter, water, and gluten-free flour until well combined.
- Cover with a damp towel and let ferment at room temperature for 12 hours.
- Add salt and olive oil, then knead gently to form a sticky dough.
- Transfer dough to a floured surface, shape into a round loaf, and let rise for another 2 hours.
- Preheat oven to 450°F (230°C) with a Dutch oven inside.
- Place the dough in the preheated Dutch oven, cover, and bake for 30 minutes.
- Remove the lid and bake for another 30 minutes until golden brown.
- Let cool for at least 1 hour before slicing.

